Friday, December 21, 2012

Struffoli

Look at me two posts in two days!!

WOW

OK so in addition to all of the cookies I make, my family and I also get together for one day in December and spend it making Struffoli.


I am always surprised to hear how many people have never hear of, or had. Struffoli!?
That is so sad.

Struffoli is a Neapolitan dish made of marble sized balls of dough that are deep fried.

They should be crunchy on the outside and light inside.
After cooled they are tossed in honey and sprinkled with nonpareils.

I know of struffoli because my Grandma Mary (Mom's Mom) used to make them.  She was not Italian, but my Grandpa Sal (Mom's Dad) was. 
After they were married they lived with his parents for a time and so her cooking was always heavily Italian influenced. 

She passed away many years ago, but i always had this faint memory of these sticky balls with sprinkles on my Mom's coffee table as we opened Christmas presents.  Finally, when i was in undergrad, my Mom and I decided to try and recreate the magic.

Armed with her dough recipe and ancient deep fryer (which was a major fire hazard) we got to work.

Making Struffoli is a daunting task. 
The dough is sticky and unruly and each ball needs to be rolled individually by hand then deep fried. 
It literally takes about 7 hours but we get enough to give to about 10 people.

If you have the time it is well worth it.

Struffoli


12 eggs
zest of 1 lemon
1 cup of canola oil
8 cups of flour
5 tsp baking powder
2 cups of sugar
1 tbs vanilla
32oz honey

Mix together flour and baking soda (start with 6 cups of flour and reserve the rest). 
In a separate bowl combine oil and sugar. 
Mix eggs into wet, one at a time. 
Add zest and vanilla. 
Add the flour mixture one cup at a time until the mixture forms a dough that you can handle.  If it is still too sticky add flour 1/4 cup at a time.  If it gets too dried out add oil 1 tbs at a time.


Heat the oil in to 400 degrees.
Now comes the hard part, as this recipe is really all about technique.
Pick off a 1/2 a handful of dough.
Cut off a strip about 1/2" wide.
Flour your surface and and roll this strip out into a long "dough snake" about 1/4" thick.


Cut the snake into equal size pieces, the same length as the width of the snake.
 
The pieces look small but they will puff up when fried.
Next dust your hands with flour and roll each individual piece until it is a uniform ball.


When you have a "plate full of balls" places them into your frying basket.  Here i used a spider.


Fry drop the balls in the hot oil. 


 Agitate the oil so that the balls don't stick together. 


As the balls fry dunk them down every so often or they will only cook on one side.


When they are golden remove from oil onto paper towel to drain.


Continue this process until all of the dough is balled up and fried.
It is best to start a sort of assembly line with some people rolling and some people frying.

After all of the balls are fried up place them in large bowels with tight fitting lids.
Heat a large bottle of honey (32oz.) in a saucepan until it is a thinner pourable consistency.
Pour honey over balls in bowels.


Let cool.
When cool, cover and let stand for 2 hours.  Flip the bowels over every 30 minutes


After this time you can distribute the balls into individual containers.


Add more honey on top if needed.  They should be coated enough to be sticky but not drippy.
Add sprinkles of choice.


Now try not to eat 1,000 of them!!!!!


Thursday, December 20, 2012

Cookie Time

It's Cookie Time!

For those of you who were not a little girl in the 80s . . . . http://www.youtube.com/watch?v=HJhchLeR1X0 
(If the link doesn't work type "cookie time troop Beverly hills" into your preferred search engine.)
Watch the video it is hilarious (you definitely need sound)!

Christmas time is prime for baking, especially cookies.
Every year my sister Mary (refer to links on the right) comes to our house to help me make cookies.  It is an all day affair.

We make about 7-8 different kinds.  Since that is too many to fully blog recipes for I will instead give you a play by play of the cookie day. (You can find any of the recipes online by searching the name of the cookie.)

Mary is very creative and artistic.  If you let her run away with herself one cookie can take her up to15 minutes.  So i gave her about 20 different cookie cutters and let her go to town on 2 of the savory selections: Almond Rosemary and Smoked Cheddar Cocktail Cookies.  Instead of using sprinkles and the usual decorations she used a multitude of spices and dried herbs.


Next we made a big favorite: Jingle Bell Bars
My Mom got this recipe out of the TV guide in 1986!  There was a special Muppet movie on TV, The Christmas Toy (http://www.imdb.com/title/tt0099263/). 
During the commercial breaks they played promos for TV guide recipes from Kraft.  I was 5 and I love love loved it.  (uh oh now you can tell how old I am)
Over the years my sister's and i have watched that old VHS, with the movie and recipes, about 100000000 times. 
These bars were one of the commercials and it is always the favorite in my, and my Mom's, Christmas cookie box.


Next we made one of my personal favorites, a simple Thumbprint Cookie.
My parent's neighbor, Maria, used to make these and I was desperate to recreate their buttery goodness.  I finally found a satisfactory recipe and make variations every year.
This year we used apricot preserves for the thumbprint filling.


That is 4 so far.

Next up is the Florentines.  These are utterly delicious like almond lace. 
Beware though they are a little fussy. 
Especially when you put them in an oven that was turned OFF! Mary!
(It was actually my fault because she asked me if she should turn the oven off and i said yes . . . but i actually meant the oven timer that was beeping.  So silly!)
I didn't like the way they came out and said i was going to remake them. Mary told me I say that every year.

(uh oh no picture! sorry)

The final cookie Mary helped me with was a Mexican Hot Chocolate Cookie.
I was nervous because they were spicy but so far I have gotten a lot of compliments on these. 
They are basic chocolate crinkles but instead of powdered sugar they are rolled in cinnamon and Cayenne!


Later in the week I made one final cookie addition, Eggnog Cookies
Make sure to use a recipe that calls for actual eggnog, not one with just nutmeg in it, as that is lame. 
These came out delicious, almost cakeliek.  I added a rummed up boozy glaze ontop that I knew my coworkers would enjoy.

(uh oh again no picture! sorry)

So that is it.  Here was the final result I had to stuff into the freezer.


I made up little boxes for people at work.  I only had enough for 16 people though!  Each person got a green box with savory cookies and a red box with sweet cookies.  Makes me very popular for a day.

We also did a cookie off similar to the pie off.  I brought in the struffoli that my Mom and I make every year. 
That will be my next blog.  Hopefully I will get to it tomorrow.

Happy cookie-ing!

Tuesday, November 27, 2012

Pie Off!

As you well know, I love to bake.

Over the years I have brought many confections into work for birthdays, holidays, etc.

Everyone always seems so pleased and interested.  So last year I decided to do a Pie Off at work for thanksgiving. 
I conceived of it as an event where all those who are interested in pies (eating/baking) could have a chance to hone or show off their skills.

Last year it was very successful with over 16 pies submitted.

Yes there is voting, but this was not my aim in it's conception so i stay out of it.

Here is a picture of the spread from last year:


Since my seat in the office has been moved, this year I opened it up to a whole new crowd and got a conference room.

We had about 12 pies, which is still respectable.

Here is a pic from 2012:


In 2011 made a chocolate rosemary tart (8th one from the front in the pic).
It was a hit and was good bc it was unique. 

Surprisingly we didn't have too many traditional pies so this year I decided to make a traditional pie with a bit of a twist . . . Apple Butter Pumpkin Pie with Streusel Topping.  (It was also a hit but I thought my selection last year was better.)

Anyhow here's how to make it . . . .

Apple Butter Pumpkin Pie with Streusel Topping
1 pie crust (store bought or refer to pate brisee post)

For the filling:
  • 1 cup pumpkin
  • 1 cup apple butter
  • 1/4 cup packed dark brown sugar
  • cinnamon
  • ginger
  • nutmeg
  • cloves
  • allspice
  • salt
  • 4 eggs
  • 1 can (12oz) evaporated milk
For streusel topping:
  • 4 tablespoons butter
  • 1/2 cup flour
  • 1/2 cup dark brown sugar
  • 1/2 cup chopped pecans

Prepare pie crust in large pie plate (9" at least! This is a slightly large pie.)
Preheat oven to 425 degrees.

The first thing to do it get the streusel topping ready as the filling is 1-2-3. 
Using the "cutting in the fats" method of pie crust making (refer to pate brisee blog) mix together the sugar, flour, and butter until form crumbs.  Like this:


Add in the chopped nuts and mix. 
Set aside 

For the filling combine the apple butter, pumpkin, sugar, spices and salt. 
(Robby and I got this apple butter on our Vermont trip.)


(I got his pumpkin at the Costco.)
(Be sure to get plain pumpkin puree and not pumpkin pie filling!!!!!)


(I don't give measures for spices bc i think you should do it to your particular taste.  Robby likes a spicy pie so i do about 3 tsp of cinn to 1/2 tsp of everything else.  For me I know it is right when the color starts to look brownish more then orange.  Maybe not as pretty but tastes like Thanksgiving!)


Next beat in the eggs one at a time until combined.
Add the evaporated milk and beat on low (or you will splash!) just until combined and smmmmmooooth.
(I think i added too much spices this year as some chunky bits were floating on top . . . . but no matter it was covered by STREUSEL!)

Pour the filling into the prepared pie crust.
Bake at 425 for 20 minutes.
Remove from oven and carefully distribute the streusel on top.
Reduce oven temperature to 350.
Bake for an additional 40 minutes.
Turn oven off and open the door a crack.  Leave the pie in oven for about an hour to cool more slowly.  (This, like in cheesecake, will prevent cracking.)

Refrigerate until ready to serve.
Whipped cream is always a nice accoutrement.


Here is the aftermath of the pie off . . .


I realize this recipe might have been more useful to people before Thanksgiving, but give me a break I was busy.  I have another post coming where i show you the other desserts i made Thanksgiving week including: Oreo cake, pumpkin walnut cake with burnt orange butter cream, and a plain pumpkin pie (for Robby).


(pssst I won "Best in Show")

Wednesday, November 21, 2012

Mastering the Art of French . . . . Baking

Robby and I went to the Library.
Guess what i got?


Don't know what it is?
Here is a hint . . . .


Can you see it?
MASTERING THE ART OF FRENCH COOKING
Julia Child's famous first cookbook. (Yes, the one from the movie.)

This book is all encompassing, and does not have that many dessert recipes.  I decided to make something simple and decidedly French (and hone my pie crust skills for thanksgiving) so i went with the Pear Custard Tart.


The most important thing about this post is going to be the making of the tart shell, as this will teach you how to make almost any pie/tart/quiche/etc. crust.

For a dessert tart shell it is called pate brisee.

Pate brisee
1 1/2 cups of flour
1/4 cup of cold filtered water
3 tbs butter
2 tbs shortening
pinch of salt
1 tbs sugar

People often seemed intimidated by pie crusts.  Psssht . . . you shouldn't be. 
Once you make them 2-3 times and master the technique you will be surprised at how easy fast and rewarding it is.

Step 1: blend salt sugar and the flour in a chilled bowl with wide rim.

(I really don't think we need any further instruction here.)


Step 2: "cut in the fats" (in this case the butter and shortening)

 
This is the second most important part of the process and there are many ways to do it.  I use my grandma's rusty old whisk (don't worry the rust is only at the top).


You can also used two knives, a pastry cutter, or even your hands.  It doesn't really matter as long as you keep the fat chilled while breaking it into little balls coated in flour. 

Just jam away at the butter/shortening with your tool of choice, scraping it off with a knife as needed, until it looks like this . . . .


Step 3: moisten the mixture

I hesitate to even give a measure of how much cold water you will need as it varies depending upon a multitude of factors (such as the density of the flour).  Start off with the 1/4 cup and slowly add to the mixture, stopping every tablespoon or so to mix lightly. 


When the mixture is too thick and gummy to stir use a folding motion with your hand.  Work quickly, as this is the most important point.  You don't want to over mix the dough or heat it up with your hand.  when you are done you should still be able to see chunks of butter and marbling from the shortening.


When all of the flour is moistened enough it will stick together in one unified ball. 
(Note it should not be wet or sticky.  If this happens you went too far so just add a little more flour to dry it out a bit.)


Step 4: rest the dough

Wrap he dough ball in plastic wrap and refrigerate at least 1 hr or overnight.
(You can also freeze it at this point for use in the next 2-3 months.)

THE DOUGH IS DONE.
GOOD JOB!

(preheat oven to 350)
The next part of the process is rolling out the dough and trimming it to your tart pan/pie crust.

This is also not nearly as hard as it seems.  The trick is to roll the dough out between two sheets of plastic wrap.  This keeps it from sticking to either your counter top or the rolling pin. 


Use the bottom of the tart pan or your pie plate flipped upside down to get the right shape and size.  Any extra pieces should be cut and added to the middle then pressed back into the circle.


When ready to put in the pan, remove one side of plastic wrap.  Flip dough onto pan exposed side down.  Press into shape of pan.  remove plastic wrap.  Then trim excess dough using the top of the pan as a guide for your knife.


ROLLING OUT THE DOUGH IS DONE.

For this recipe we need to partially bake the shell.  This is especially common for tarts, not so much for pies.

I have pie weights but you can use any form of dried beans.  Fill the shell up and place in oven for 10 minutes. 


Remove and let cool while you prepare the filling.

For this recipe you'll need 4 large pears.  I like anjou.
Slice the pears up into 3/16" slices. (Not 1/8" not 1/4" . . .3/16"!)
Mix with 1/2 cup sugar and 1 tsp cinnamon.


arrange the pears in your par baked shell.  I went overboard and beautified my arrangement bc i wasn't sure if they were going to poke through the custard.  They won't don't waste your precious time!


Now you can pull the custard together.  It is a snap.  Mix . . .

1/4 cup butter
1 cup sugar

Add . . . .

2 eggs

Beat until light and fluffy (as usual).
Add . . . .

1/4 cup flour
1 TBS vanilla

Pour over top of pears.


Bake at 350 for 45 minutes or until top browns along edges.


Robby liked it.


THANKS NYPL (that's the New York Public Library)!


Thursday, November 8, 2012

MAPLE CAKE

[HOLY MOLY . . . . sorry about the delay but as you are all aware there was a hurricane!
Everything is fine with Robby and I.  However I was out of work for a week and we still do not have internet so I could not post this Blog.  But seriously if the worst thing that happened to us is that I couldn't post my blog we are exceedingly lucky.  Now to some actual food talk . . . . ]

 
Robby and I went to Vermont recently. 

This is the pretty place we stayed . . . .


This is some dumb covered bridge. . . . .


This is the story about food . . . .
 
For anyone that has been to Vermont you know that their favorite thing is maple syrup . . . . maple this maple that . . . . maple maple maple. 

So I jumped on the Maple bandwagon. 


Robby bought me 2 maple syrup cookbooks at a roadside store on our trip ($1.25 each was an irresistible price).   

So for Robby’s dessert this week I made one of the recipes from the “Third Edition.”


MAPLE CAKE


CAKE

1 ½ CUPS SUGAR
1 CUP BUTTER
3 EGGS (SEPARATED)
¾ CUP (HONEY FLAVORED* OPTIONAL) GREEK YOGURT
2 ½ CUPS CAKE FLOUR (SIFTED)
1 ½ TSP BAKING POWDER
½ TSP BAKING SODA
1TSP NUTMEG
1 TSP CINNAMON
½ TSP CLOVES
½ TSP SALT

Cream together the butter and sugar.
Add egg yolks.
Sift together all dry ingredients (INCLUDING SPICES).
Add dry ingredients to butter/egg mixture alternately with yogurt.
Whip egg whites until stiff peaks form and fold into batter mixture.
Divide batter between two 9” greased cake pans
Bake at 350 for 20-25 minutes.
Refrigerate cooled cakes until ready to assemble.


Like my pepper plants? 

(Absolutly nothing to do with this cake though.)


MAPLE MOUSSE FILLING


1 PACKET OF GELATIN
¼ CUP WATER
¾ CUP MAPLE SYRUP
2 CUPS HEAVY CREAM
½ CUP FINALY CHOPPED PECANS


Boil syrup until reduces by 1/3.  Turn off heat.
Dissolve gelatin in cold water for 5 minutes.
Add to hot syrup and stir till dissolved.
Refrigerate.
What syrup mixture is fridge temp whip heavy cream to stiff peaks.
Whip in syrup mixture.
Fold in nuts.
Refrigerate until ready to assemble cake.

MAPLE BUTTERCREAM

3 EGG WHITES
¾ CUP MAPLE SYRUP
2 STICKS SOFTENED BUTTER


Bring syrup to boil.  Continue to boil till temp reached 275 degrees.
Whip egg whites till soft peaks form.
Slowly pour syrup into whipped whites while continuing to whip on medium speed.
Continue to whip for 5 minutes, until even and glossy.
Add butter 1tbs at a time whipping until smooth.  As shown in picture above.

ASSEMBLE THE CAKE
Skim brown parts off of bottom and side of cold cakes, and then slice in half.


Place one cake layer on plate.  Cover with third of maple mousse filling.


Cover with additional layer.  Cover with third of maple mousse filling.
Repeat.  If desired spice up the top layer.  (Makes it look like a big mac or soemthing right?)


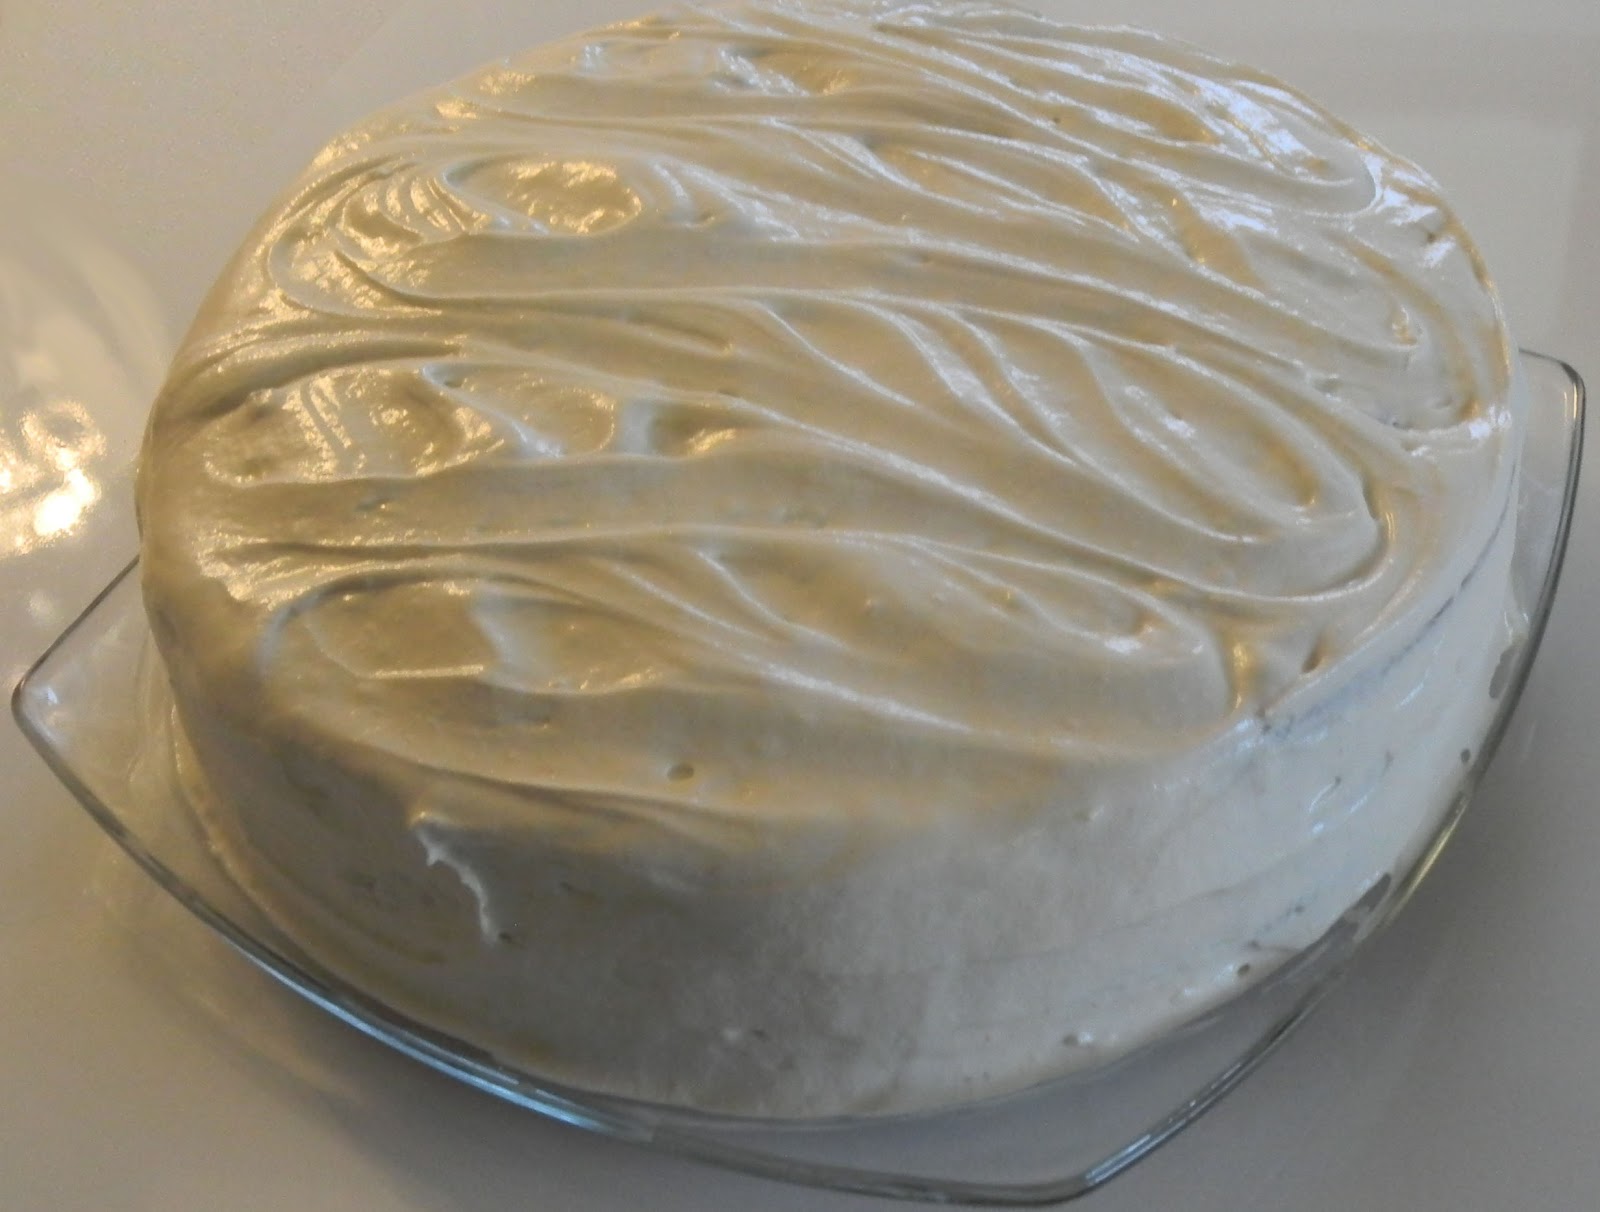
Cover top layer and sides of cake with maple buttercream.  Do a swirrrrrly whirrrly on top.


Cake should be refrigerated 2hrs minimum before serving.


Thanks Vermont!